Read Time: 4 Minutes Subscribe & Share
Carrying The Torch
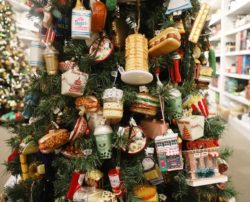
 Larissa’s choice of food ornaments was boss (as she is) in the days of La Cuisine. Many were from Old World Christmas, but she found other treasures too. You’ll find the story of the Merck and Inge Christmas ornaments fascinating. In the meantime, I received a couple of plaintive requests about where to find food ornaments like Larissa’s, and I did not have to burrow too far. Red Barn Mercantile has a dandy selection of food-related ornaments. They also have one of the best Christmas unveiling parties in my neighborhood of make believe, so if you
 are in the area, get on their email list. If you’re not in this area, their website has very clear images of all their selections. Red Barn and its sister store Penny Post will ship anywhere in the US and APOs plus they offer free shipping for purchases over $150 at Red Barn and the same for purchases over $100 at Penny Post.
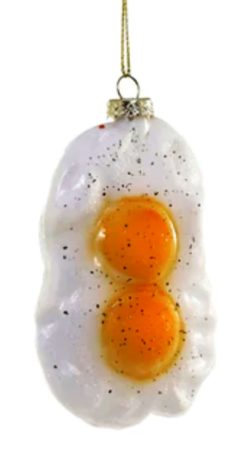
 As IG followers of KD know, the other person in this house is noted for his sausage or
 bacon, fried eggs, piled with grits or toast breakfast My quest this year was to find the perfect ornament for him. And, of course, owner Amy Rutherford and her devilish crew had offered more than one smashing possibility in the Fried Egg Holiday Decor Division. I think it was the beautifully rendered addition of freshly ground pepper that sold me on this one.
A Crafty Day Trip
 One of the coolest projects KD did with Katrina Tines was our summer Lemonade Stand Cookie Kit. Kat used to run the best cookie decorating classes at the shop. Her training as a special ed teacher, in addition to her skills as an artist made an unbeatable combination in our classes. You should check out her Instagram feed and be astounded at her make-up – she is particularly fond of Halloween.
Students told us that Kat revolutionized how they decorated cookies. But she also waves her creative wand in other crafty directions, and has now created her own studio Wild Lines – in Culpeper, Virginia, offering an unusual array of classes and events (and she does craft parties there as well).
You should consider a day trip to Culpeper as it is a lovely drive – a bit over an hour from here. This small historic town offers charming stores and eateries, as well as Kat’s unique studio workshop. She does offer a cookie decorating class- one for children and one for adults – but check some of the others – creating ornaments from wood or macrame, or creating an unusual and personal charcuterie and cheese board. You might want to enjoy shopping and touring Culpeper and its lovely countryside, while your children or grandchildren participate in her Gingerbread House class or her Grinch Film & Crafts. She also schedules wonderful kids programs for the dreary JanFebs.
I asked Kat for some of her personal favorites in Culpeper and she sent me the following: Pinto Thai for any meal, Raven’s Nest for a warm beverage and snacks, and Botanical Dwellings, a most unusual shop with plant decor and gifts.
A Stay At Home Project
You can also be somewhat crafty and make your own ornaments with salt dough. It is a very simple combination fo flour, salt, and water. I found later on a now defunct British website the following recipe that added a bit of oil, which I preferred to the ones you normally find on the internet. I cover the dough with a bowl and let it rest for 30 minutes as you would pasta dough before rolling out. Don’t forget (as I did one year) to punch a hole in the top part of your unbaked ornament – or you won’t have a way to hang it after it’s baked!
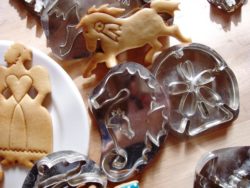
 Many of you have Hammersong cutters, which had a cult following in the shop, including myself. We used to have classes with Betsy Cukla of Hammersong, and I have used mine for both ornaments and cookies and sometimes pasta! But you can use any cutter or make rolled dough ornaments like wreaths. You can spray your ornaments with a craft spray once they have cooled. I have found Fancy Flours.com to be an excellent source for a lot of the supplies we used to carry for Betsy Cukla’s designs. If you color your dough, or use a tinted frosting, I think the natural food colors from India Tree are phenomenal and safe. Have fun, and please send us photos of your creations!
- 4 cups of plain flour
- 1 cup of salt
- 1-2 cups of hot water (from the tap)
- 2 teaspoons of vegetable oil
- Mix the salt and flour together, and gradually add the water until the dough becomes elastic, then
- add the vegetable oil.
- If the mixture is too sticky, add more flour; if it’s too dry, add more water.
- Knead the dough until it’s a good consistency, then use your imagination to make your art.
- To add interest, you could add glitter or food coloring to the dough.
- When you have finished your sculpture, you can bake them in the oven at 200 degrees or gas mark 6.
- Baking times will depend on the size and thickness of your sculpture.
- You can paint your sculpture with poster paint when it has cooled.
- I let my dough rest under cling wrap and you can spray with water as you roll out sections of the dough if it gets dry.
- The ornaments should be dry and hard, so they can take 1 to 2 hours to bake.
- Don't forget to punch a hole in the unbaked ornament before you bake it - otherwise you won’t have an opening for a ribbon or string to hang it!

Kitchen Detail shares under the radar recipes, explores the art of cooking, the stories behind food, and the tools that bring it all together, while uncovering the social, political, and environmental truths that shape our culinary world.


Comments are closed here.
Follow this link to create a Kitchen Detail account so that you can leave comments!