{"cameraPreset":7,"cameraType":"Wide","macroEnabled":false,"qualityMode":2,"deviceTilt":0.022029105581319541,"customExposureMode":0,"extendedExposure":false,"whiteBalanceProgram":0,"cameraPosition":1,"shootingMode":0,"focusMode":0}
So in honor of this being the fifth Wednesday of July (following our tradition of giving KD readers a bonus recipe
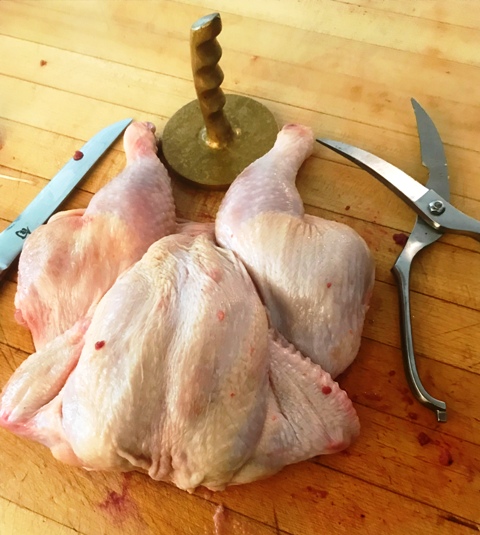
Once you have spreadeagled the chicken, don’t salt and pepper it yet. Flip it so that the breast side is facing toward you and take a meat pounder or the smaller fry pan and flatten it further, particularly on the breast part.(I like a pounder like the one pictured
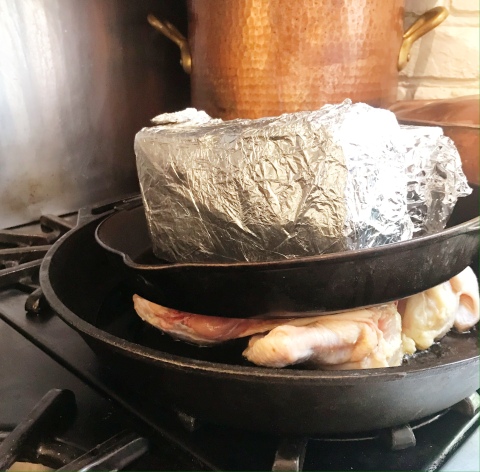
Heat your larger cast iron pan and brush it with olive oil. You want a medium to medium high heat. I have botched this up on a couple of occasions with too high heat. So this is the fiddly part where practice makes perfect, but even less successful spatchcocked chickens cooked following this method are still delicious. So once this pan is hot, but not smoking – we are not doing Paul Prudhomme here -lay your chicken breast side down in the pan. Put the smaller cast iron pan on top and the two bricks inside. I always press down a couple of times. Set your timer for 12 minutes (if it is a heavier chicken, add a couple of minutes).
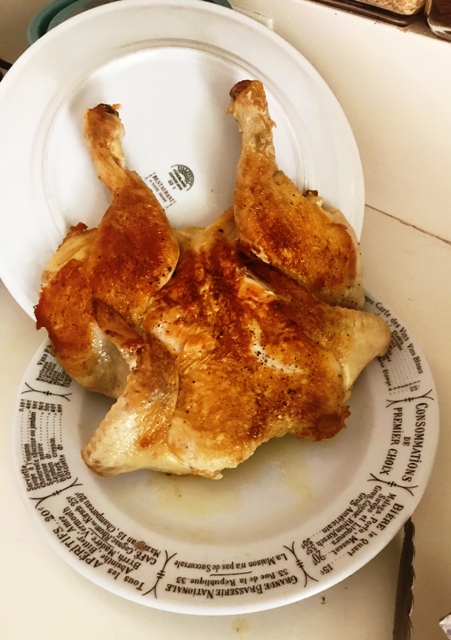
When the time is up, and the thermometer shows a reading of 165 or a bit less, then place it with tongs so that the chicken is at an anglel -legs up, breast down on the two plates. You will prop one plate against a canister or can and the other plate is on the counter, touching the vertical one – sort of like an open clam shell. This is the cool part that makes a difference (I have tried skipping this. Don’t.). The chicken will cook a bit longer as it stands on its head — for maybe 10-20 minutes, your call. Cover the chicken with foil or a towel while it is resting. The juices run down through the breast. I did not believe this step could make a difference, but I was wrong. Place it on a platter or board, carve into serving pieces and serve.You can sprinkle a bit more salt and pepper freshly ground.(I used flaked salt or fleur de sel ) Add some lemon slices to the platter if people like a bit of lemon juice squeezed on their beautifully cooked chicken. I do.
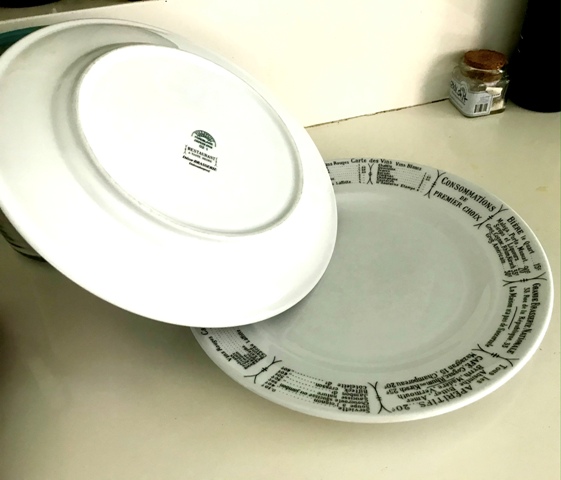
A postscript on resting the chicken – several readers wrote me that I needed to take photos of how to rest the chicken against two plates before serving – so I hope that these two photos help!
After owning one of the best cooking stores in the US for 47 years, Nancy Pollard writes a blog about food in all its aspects – recipes, film, books, travel, superior sources and food related issues.
Gelato Concerns One of the things I found to fret about when we moved to…
I am a sucker for farmers markets. When we were first married and rented part…
Ham Histories Since I now reside in one of the reigning ham regions of the…
A Different Party Wars have unintended consequences, as anyone who reads Heather Cox Richardson obsessively…
Defending The Sandwich Someone very close to me took exception to the anecdote in the…
For the life of me, I cannot remember which marvelous food writer (perhaps Waverly Root…
View Comments
Hmm—interesting final technique for spatchcocked chicken..wish I had a picture but I think I can figure it out. Thank you for all your equipment recommendations; it’s so nice that you’re continuing to be what La Cuisine was for me, the Temple of the One Good Thing. I am returning to Alexandria from Hawaii and my copper pans all need re-tinning. Do you have any recommendations? Warm Regards and Aloha
Aloha Diana!
You are the second person who asked me to show an image, so I will post one as soon cook another chicken in this Italian style. It really is easy, but you are are right that a picture is worth a thousand words!
Nancy
Diana,
Just did a spatchcock chicken last night and took photos so I hope these make it clear how to prop the plates and rest the chicken.
Nancy
Loved this recipe! Will try it soon. I find that Whole Foods often has smaller whole chickens. I agree with Diana, a picture of that last step would be helpful. Thank you for continuing to support the love of good food through your blog.
Francine,
Just put the photos up today of how to rest the chicken afterwards. Let me know if you have any questions.
Nancy